Website restoration goes more smoothly when your tools are doing distinct jobs instead of tripping over each other.
If you are trying to recover a site, it is normal to ask a few practical questions right away: Which tool should handle backups? How do you keep search visibility from slipping? What helps you fix media without slowing the site down? And how do you avoid making a stressful job even messier?
A good tool stack lowers risk because it helps you keep a copy of the site, track your changes, and spot problems before visitors do. The WordPress backup guide and Google Search Central documentation both point back to the same practical truth: keep recoverable copies, and verify what search engines can still see after a change.
In this guide, you will find a beginner-friendly set of tools for backup, content management, SEO checks, image optimization, and version control. You will also see how to choose the right mix for your project and how to use those tools in a calm, repeatable way.
Essential website restoration tools at a glance
| Tool type | What it helps with | Beginner-friendly examples | Best time to use it |
|---|---|---|---|
| Backup tools | Saving a full copy of files and database content before repairs | UpdraftPlus, BackupBuddy, host snapshots | Before any plugin, theme, content, or server change |
| Content management systems | Editing pages, media, navigation, and settings from one place | WordPress, Joomla | During content cleanup and structure rebuilds |
| SEO analysis tools | Checking indexing, broken links, metadata, and crawl issues | Google Search Console, Ahrefs, Semrush | After migration, redesign, or URL changes |
| Image optimization tools | Reducing image size without making pages look muddy | TinyPNG, ImageOptim, ShortPixel | Before uploading new media and after bulk restoration |
| Version control systems | Tracking code changes and rolling back risky edits | Git, GitHub, GitLab | Any time theme, plugin, or custom code changes are involved |
The main idea is simple: no single tool restores a website on its own. A stable process usually combines one tool that preserves the site, one that helps you edit it, one that checks performance and visibility, and one that tracks technical changes.
1. Backup tools: your first line of defense
Before you change anything, create a backup. That is the practical next step in almost every restoration project, whether you are fixing a broken theme, cleaning up a bad update, or rebuilding pages after content loss.
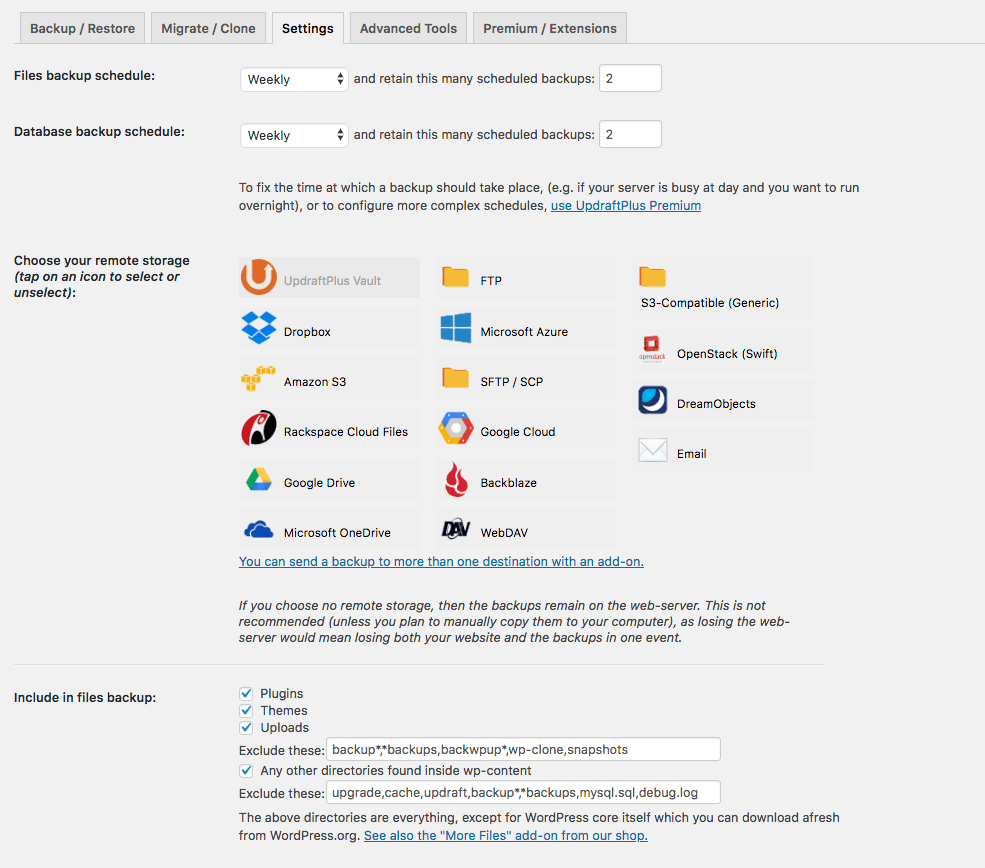
Backup tools such as UpdraftPlus and BackupBuddy are popular because they package the website files and database into something you can restore later. Many hosting providers also offer snapshots or full-account backups, which can be helpful when the problem affects more than WordPress itself.
What this means in practice: a good backup tool should let you answer three calm questions. Do I have a recent copy? Can I restore it without guesswork? Can I store another copy somewhere separate from the live server?
Practical tip: keep at least one off-site backup. A backup stored only on the same server is a bit like hiding your spare key inside the locked car.
What to look for in a backup tool
- Full-site backups that include the database and uploaded files.
- Scheduled backups so you do not have to remember every time.
- Simple restore steps that are documented clearly.
- Storage options outside the live hosting account.
2. Content management systems: where the restoration takes shape
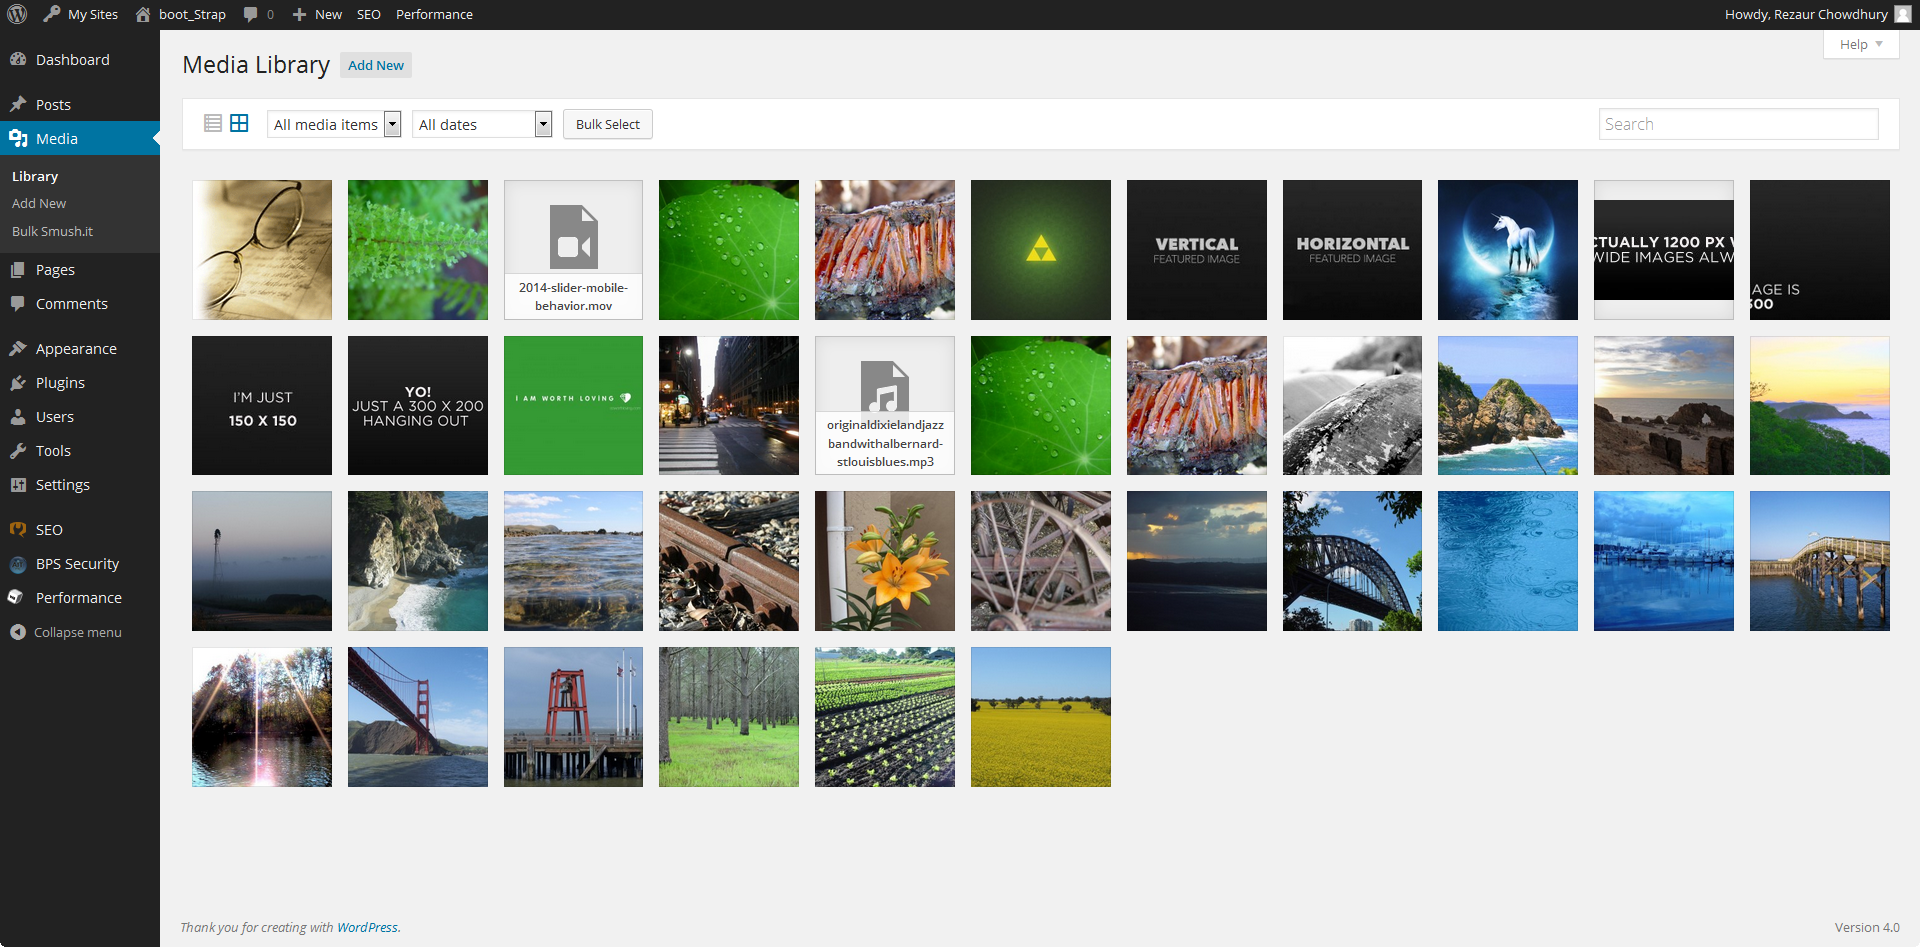
A content management system, or CMS, gives you the working space for rebuilding pages, menus, media, and post structure. If the website lives in WordPress or Joomla, the CMS is not just part of the site. It is also one of your main restoration tools.
WordPress is often a comfortable choice for beginner-friendly restoration because it has a broad plugin ecosystem, familiar editing screens, and plenty of documentation. Joomla can also be a solid fit when the site already depends on its structure and extensions. The right move is usually to work with the platform the site already uses well, rather than forcing a rushed platform switch in the middle of recovery.
Practical tip: use a staging copy if you can. Restoring directly on the live site is possible, but it raises the stakes for every click and every saved setting.
3. SEO analysis tools: checking what visitors and search engines still see
Restoration is not finished when the pages load. You also need to confirm that important URLs still work, metadata still makes sense, and search engines can crawl the site properly. This is where SEO analysis tools earn their keep.
Google Search Central is especially useful after a restoration because it helps you monitor indexing, coverage issues, and crawl visibility. Tools such as Ahrefs and Semrush can help you review broken links, missing titles, redirects, and ranking changes after the repair work is done.

If a site has gone through a redesign, plugin cleanup, or URL update, these tools help you catch the quiet problems. Those are the annoying ones: the site looks fine at first glance, but key pages are no longer discoverable.
Helpful SEO checks after restoration
- Review indexed pages and crawl errors.
- Check for broken internal links and missing redirects.
- Confirm page titles, meta descriptions, and canonical settings.
- Compare traffic trends before and after major changes.
4. Image optimization tools: small files, faster pages, fewer headaches
Images often survive restoration in a slightly clumsy state. They may be too large, uploaded twice, saved in the wrong dimensions, or slowing down a page that already has enough going on. Image optimization tools help clean that up.
TinyPNG is a simple choice for compressing images before upload, while ImageOptim is a reliable option for local optimization on Mac. These tools do one practical job very well: they reduce file size while keeping the image usable for readers.
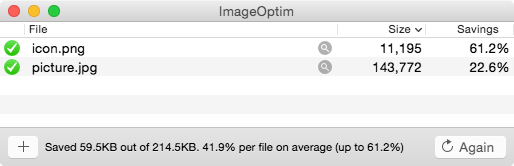
Practical tip: optimize images before a bulk re-upload. That gives you cleaner media from the start and saves you from revisiting the same library later with a sigh and a large coffee.
5. Version control systems: protection for technical changes
When restoration includes theme edits, custom code, template changes, or plugin development, version control becomes essential. Git is the standard tool here because it records what changed, when it changed, and who changed it.
The official Git documentation is worth bookmarking even if you only use a few commands. For restoration work, the real benefit is not sounding technical. It is being able to step back through changes instead of guessing which file broke the layout.
Even small teams benefit from this. A single developer, contractor, or site owner can use Git to keep restoration work organized and reduce accidental overwrites.
How to choose the right tools for your project
The best tool set depends on the project in front of you, not on the biggest feature list.
Start with the size and complexity of the site
A five-page brochure site may only need a dependable backup tool, a CMS workflow, and a basic SEO check. A larger site with custom templates, multiple editors, and a history of redesigns will usually need version control, staging, and stronger auditing tools.
Match the tool to the budget without ignoring risk
Free tools can be perfectly sensible for small projects, especially when you have time to test them. Premium tools often earn their cost when they save labor, shorten restore time, or make rollback easier. The question is not whether a tool is free or paid. The question is whether it lowers the cost of a mistake.
Favor clarity over cleverness
For beginners, a tool with a cleaner interface and good documentation is often the better choice. Website restoration already asks you to keep track of files, content, links, and settings. You do not need a confusing dashboard turning that into a hobby.
Tips for using restoration tools effectively
Keep tools updated, but test major changes first
Outdated tools can create security and compatibility problems, but rushing updates on a fragile site can create new ones. Test major plugin, theme, and PHP changes on staging whenever possible.
Use tools together, not in isolation
A strong restoration workflow often looks like this:
- Create a fresh backup and confirm it can be restored.
- Make content or code changes in the CMS or staging environment.
- Track technical edits with version control when code is involved.
- Optimize newly uploaded media so page speed does not drift.
- Run SEO checks before calling the work finished.
Document the restore path
Keep a short record of what changed, which plugins were updated, which redirects were added, and which pages were restored first. A plain text checklist is enough. The goal is not ceremony. The goal is being able to retrace your steps if something behaves strangely tomorrow.
A sensible starting stack for beginners
If you want an easy starting point, use one backup tool, one familiar CMS workflow, one SEO checker, one image optimizer, and Git for any code-level work. That stack covers the main risks without making the process feel crowded.
Before you add more tools, ask whether the next tool solves a real problem. More dashboards do not always mean more control. Sometimes they just mean more tabs.
If you want more practical reading after this, the blog has additional guides on website planning, maintenance, and restoration basics.
Conclusion
Website restoration becomes much more manageable when each tool has a clear role. Backup tools protect your starting point. A CMS helps you rebuild. SEO tools confirm visibility. Image optimization tools keep pages efficient. Version control protects technical edits.
The right mix will vary by project, but the pattern stays steady: save a recoverable copy, make changes in an organized way, and verify the result before you move on. That is not glamorous, but it is dependable, and dependable is exactly what restoration work needs.